Safe Install Pricing Locksmith Guide: 3-Tier Formula

Meric Karpat · Founder & CEO
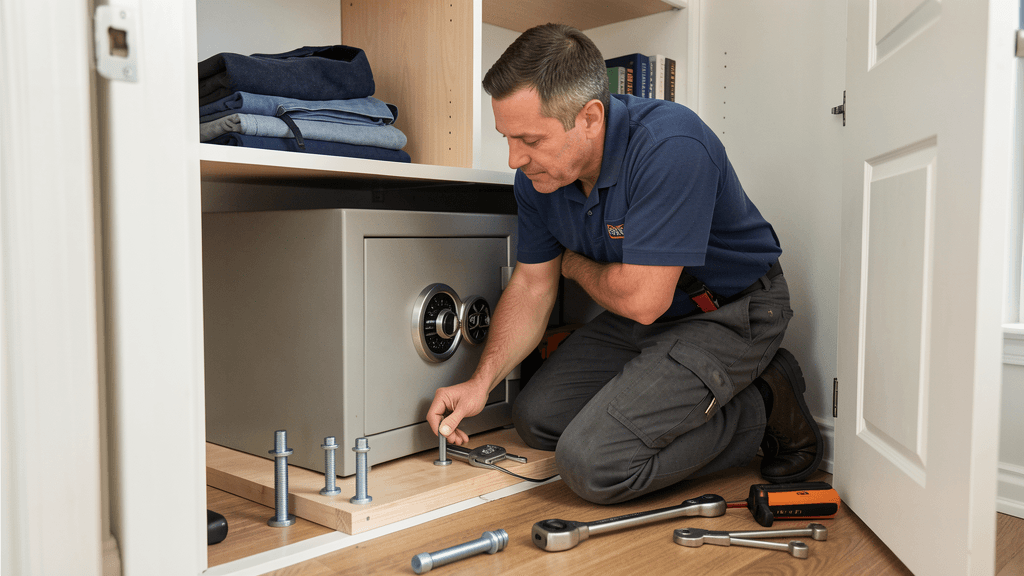
You get a call from a homeowner who just bought a 350-pound Hollon floor safe from a Costco business sale. She wants it bolted to the concrete slab in her closet. Her insurance agent told her the safe needs to be "professionally installed" or the policy won't cover the $15,000 in jewelry she plans to store inside. She asks what you charge. If you say "$150 and I'll be there in an hour," you just left $200 on the table and took on liability you didn't account for.
Safe install pricing locksmith work is not a flat-rate service call. The safe's UL rating, the floor material, the anchor type, and the documentation your customer's insurance company requires all change what the job is worth. A residential B-rated floor safe anchored to a slab is a 90-minute job. A commercial TL-30 bolted to a reinforced concrete base in a retail back office is a half-day job with engineering requirements. Pricing both at the same flat fee is how locksmiths undercharge on the hard ones and overprice the easy ones.
The U.S. Bureau of Labor Statistics reports that locksmiths and safe repairers earn a median wage of $25.18 per hour as of May 2024. But that wage reflects employee compensation, not what an independent shop needs to charge to cover overhead, insurance, vehicle costs, and non-billable time. Your effective billing rate needs to be 3 to 4 times your target personal wage to keep the business solvent.
What Safe Install Pricing Locksmith Work Actually Involves
A safe installation breaks down into four cost layers: site assessment, anchoring labor, hardware, and documentation. Most locksmiths price only the first two and eat the rest. Here is what each layer actually costs you.
1. Site assessment (30-45 minutes, $0-75). You drive to the site, measure the floor, check for rebar, confirm the safe's dimensions fit the closet or office space, and verify the UL rating matches what the insurance policy requires. You should charge a trip fee if the customer decides not to move forward. If they book the install on the spot, waive it.
2. Anchoring labor (45 minutes to 4 hours, $85-400). The time range is enormous because the difficulty range is enormous. A 350-pound safe on a 4-inch residential slab with no rebar takes 45 minutes to drill and bolt. A 1,200-pound TL-30 on a commercial floor with rebar at 6-inch intervals requires a rotary hammer, epoxy anchors, and sometimes a concrete saw to expose the rebar pattern. The labor cost should scale with the rating, not stay flat.
3. Hardware ($15-120). Anchor bolts, epoxy kits, shims, and drill bits are consumables. Half-inch wedge anchors for a residential safe cost about $3 each and you need 4. Epoxy anchor kits for commercial work run $45-80 per kit. Carbide-tipped masonry bits for rebar-laden concrete cost $18-35 each and you burn through one every 3-4 commercial jobs. Track this cost or it disappears into your margin.
4. Documentation ($0-50 in time, priceless in liability). The insurance company will ask for proof of professional installation. This means a signed work order with the safe's serial number, UL rating, anchor type, anchor locations, and photos of the completed installation. You should include this in your price, not offer it as an add-on. A customer who gets denied a claim because you didn't provide documentation will not call you again and may name you in the dispute.
The 3-Tier Rating System and Why It Drives Your Price
Underwriters Laboratories rates safes based on how long they resist forced entry. The rating determines what the safe is worth insuring and how much installation work it requires. Your pricing should map directly to these tiers.
Tier 1: B-Rated and RSC Safes ($150-280 installed)
B-rated safes are residential-grade steel boxes with a 1/2-inch steel door and 1/4-inch body. The Residential Security Container (RSC) rating means the safe resisted a 5-minute attack with common hand tools in UL testing. These are the safes people buy at Costco, Sam's Club, or online for $200-600. The customer is usually a homeowner storing documents, a handgun, or modest jewelry valued under $10,000.
The install is straightforward: 4 wedge anchors into a concrete slab, 45-60 minutes of labor, and a photo of the finished job. Your hardware cost is under $20. Price this at $150-280 depending on your market. In a mid-size city, $200 is the sweet spot. In a rural area with less competition, $250 works. In a saturated metro, $175 keeps you competitive without racing to the bottom.
Tier 2: TL-15 and TL-30 Safes ($300-550 installed)
TL-15 safes resist 15 minutes of attack with hand tools and a grinding wheel. TL-30 extends that to 30 minutes. These safes weigh 400-900 pounds and cost the customer $800-3,500. They are common in small businesses: pharmacies, jewelry counters, restaurants with high cash volume, and home offices where the owner keeps $20,000+ in valuables.
The install is harder. The safe is heavier, requiring two people or a stair-climbing dolly. The floor needs to handle the point load. You will use 4 to 6 half-inch wedge anchors or through-bolts if the customer allows you to go through the slab. Expect 1.5 to 2.5 hours of labor. Hardware runs $25-50. Price at $300-550. The low end is a TL-15 on a residential slab. The high end is a TL-30 on a commercial floor with through-bolts and a second technician.
Tier 3: TRTL-30 and Above ($600-1,200+ installed)
TRTL-30 safes resist 30 minutes of attack with both hand tools and a cutting torch. These weigh 1,000-2,500 pounds and cost $3,000-12,000. Your customers are jewelry stores, pawn shops, cannabis dispensaries, and businesses with high-value inventory where the insurance policy mandates a specific rating.
This is a different job. You need a second technician, a pallet jack or forklift access, and possibly a rigger for anything over 1,500 pounds. The anchoring may require epoxy anchors rated for shear load, not just wedge anchors. Plan for 3-5 hours of labor, $60-120 in hardware, and a concrete assessment before you quote. Price at $600-1,200 for standard commercial installs. If rigging is involved, add $300-800 and subcontract the rigger.
Residential Floor Safe Installs: Scoping the Job
The most common safe install you will quote is a residential floor safe in a closet or home office. Here is how to scope it in 10 minutes on-site without underquoting.
First, check the floor. If it is concrete slab, ask the homeowner when the house was built. Pre-1970 slabs in some regions may contain asbestos in the slab compound or tile adhesive. If the floor is post-1980, you are generally clear. If you encounter tile, ask the homeowner to remove it before you arrive. You do not want to be the locksmith who drilled through a vintage terracotta tile and owes $400 for a replacement.
Second, check for rebar. Tap the slab with a hammer in the four corners where you plan to drill. A hollow ring means no rebar near the surface. A sharp ping means rebar or mesh. If you hit rebar, you need a rotary hammer with a rebar-cutting bit, which adds 20-30 minutes and $15 in bit wear. Mention this in your quote: "If rebar is present, add $45 for additional drilling time and bit replacement."
Third, measure the safe's footprint and add 2 inches on each side for your drill and torque wrench. A 24x18-inch safe needs a 28x22-inch clear space. If the closet has baseboards or a door frame that eats into that space, you may need to pull the safe out 6 inches from the wall and shim it. Shimming adds 15 minutes and $5 in hardware.
Commercial TL-30 Installs: When the Job Gets Serious
Commercial safe installs are where locksmiths either make their best margin or take their worst losses. The difference comes down to one question: did you check the floor load rating before you quoted?
A 1,200-pound TL-30 safe placed on a second-floor office with a 50 psf live load rating is a structural problem. The safe alone exceeds the floor's design load at its footprint. The building owner needs an engineer's letter before installation, and that is not your problem to solve but it is your problem to flag. If you show up with the safe and the floor cannot support it, you will spend 4 hours figuring out what to do and get paid for 2.
Quote commercial TL-30 installs in two phases. Phase 1 is a site visit at $75-125 where you measure the floor, check access routes (door widths, elevator weight limits, stair loads), and confirm the safe's dimensions. Phase 2 is the install itself at $400-800 plus hardware and a second tech. This two-phase approach filters out tire-kickers and prevents you from quoting blind on jobs where the access alone eats your profit.
Anchor Bolts, Concrete, and Floor Conditions That Change Your Quote
The anchor system is the single most underpriced component in safe installation. A safe that is not anchored is a box a thief can wheel out on a hand truck. Insurance companies know this, and many policies require anchoring as a condition of coverage. Here is what different anchor scenarios cost you in time and hardware.
Standard wedge anchors in clean concrete: 4 half-inch by 3-inch wedge anchors, 30 minutes to drill and torque, $12 in hardware. This is your baseline. Most residential jobs.
Epoxy anchors in cracked or aged concrete: 4 half-inch epoxy anchors with threaded rod, 60 minutes including curing time, $45 in hardware. Use these when the concrete is older than 30 years, has visible cracks, or is less than 3.5 inches thick. The epoxy distributes load across a wider area than wedge anchors.
Through-bolts with backer plate: 4 half-inch bolts through the slab with a steel plate on the underside, 90 minutes if you have crawl space access, $30 in hardware plus access time. This is the strongest residential anchor and some insurance policies require it for safes holding over $25,000 in valuables.
Rebar encounters: Add $45 per anchor point where you hit rebar and need to relocate the hole or switch to a rebar-cutting bit. This is not an upsell. It is a real cost that you should disclose before drilling, not after.
Insurance Documentation: What the Customer's Agent Will Ask For
The National Insurance Crime Bureau reported that jewelry and precious metal claims averaged $8,907 per incident in recent years, with a significant portion involving items stored in home safes. When the customer files a claim, the insurance adjuster will request proof that the safe was professionally installed and anchored. If you did not provide documentation, the claim process gets harder for your customer and your name comes up in the conversation.
Include a one-page installation certificate with every safe install. It should contain:
The safe details: manufacturer, model, serial number, UL rating, and weight. Copy these from the safe's data plate, not the customer's receipt. Customers sometimes buy a different rating than they think they did.
The anchor specification: anchor type (wedge, epoxy, through-bolt), diameter, length, number of anchors, and placement locations. Include a simple diagram showing where each anchor sits relative to the safe's footprint.
Photos: one wide shot of the installed safe in its location, one close-up of each anchor point, and one of the safe's data plate. Four photos. Take them before you leave the job site.
Your signature and license number: your state locksmith license number (if your state requires one), the date of installation, and your contact information. This makes the certificate verifiable, which is what the adjuster needs.
Print this on a half-sheet template you keep in your truck. Fill it out on-site, hand a copy to the customer, and keep a photo for your records. It takes 5 minutes and it is the difference between a customer who refers you to their insurance agent and one who blames you for a denied claim.
Quoting Best Practices and Revisit Cadence
When a customer calls for a safe install quote, give them a range, not a flat number. "For a B-rated floor safe on a concrete slab, you're looking at $175 to $225 depending on rebar and anchor type. For a TL-30 commercial safe, it starts at $400 and goes up based on floor conditions and access." A range signals expertise. A flat number signals guesswork.
Always ask three questions before quoting over the phone: What is the safe's UL rating or brand and model? What is the floor material (concrete, wood, raised access floor)? And what is the estimated value of what they plan to store? The third question tells you whether the insurance documentation matters. If they are storing $500 in documents, documentation is a courtesy. If they are storing $30,000 in jewelry, documentation is the deliverable.
Review your safe install pricing every 6 months. Hardware costs are stable, but your labor rate should rise with your overhead. If your general service call rate has gone from $89 to $110 in the last year, your safe install base rate should move proportionally. A good rule: your Tier 1 safe install should never cost less than 2 times your standard service call rate. If it does, you are pricing installation as a loss leader, and safe installs are not loss leaders. They are skilled labor with liability attached.
This guide is published by Heyfield, which makes an AI phone receptionist for home-service trade businesses. If you ever can't take the call, that's what we do. See pricing. The rest of our trade-business resources are free at heyfield.app/blog.
Frequently Asked Questions
How much should a locksmith charge to install a residential floor safe?+
A B-rated residential floor safe on a concrete slab should be priced at $150-280 installed, with $200 being the sweet spot in most mid-size markets. Add $45 if you encounter rebar or need epoxy anchors in aged concrete.
What is the price difference between installing a TL-15 and a TL-30 safe?+
A TL-15 safe install runs $300-400 while a TL-30 starts at $400 and can reach $550 depending on floor conditions, anchor type, and whether you need a second technician for the heavier weight.
Does insurance require professional safe installation for coverage?+
Many homeowners and business insurance policies require professional installation with documentation for safes covering valuables over $10,000. Check with the customer's agent before quoting, and always provide an installation certificate with photos and anchor specifications.
What anchor type should I use for a safe on an older concrete slab?+
For concrete older than 30 years or slabs under 3.5 inches thick, use half-inch epoxy anchors with threaded rod instead of wedge anchors. Epoxy distributes load across a wider area and costs about $45 per kit versus $12 for wedge anchors.
How do I price a commercial TRTL-30 safe installation?+
TRTL-30 installs start at $600 and range to $1,200 or more. Quote in two phases: a $75-125 site visit to assess floor load, access routes, and rigging needs, then the install at $400-800 plus hardware and a second technician. If rigging is required, add $300-800 and subcontract the rigger.
What should a safe installation certificate include for insurance purposes?+
Include the safe's manufacturer, model, serial number, UL rating, and weight. Document the anchor type, diameter, length, number, and placement with a simple diagram. Take four photos: wide shot, each anchor point, and the data plate. Sign and date it with your license number.
Should I charge a trip fee for a safe install site assessment?+
Charge $75-125 for the site visit if the customer has not yet committed to the install. If they book on the spot, waive the fee and fold it into the installation price. This filters out non-serious inquiries and covers your drive time.
How often should I review my safe installation pricing?+
Review every 6 months. Your Tier 1 safe install should never cost less than 2 times your standard service call rate. If your service call rate has increased, your safe install base rate should move proportionally to keep pace with overhead.
Ready to stop missing calls?
Try Heyfield free for 7 days. Your AI receptionist answers every call, collects customer details, and texts you the summary.
Keep Reading
Why Welding Shops Can't Risk Answering Their Own Phones
Sparks fly, face shields go down, and phone calls go to voicemail. How safety-first welding shops lose business to missed calls.
ReadPool Service Owners: Every Missed Call Costs You $900
Pool season is short and winterization is now. One missed call can cost you a full-season client worth $900+. Here's how solo pool service pros stop losing jobs to voicemail.
Read