Shower Pan Waterproofing Failure Callback: 4 Missed Steps

Meric Karpat · Founder & CEO
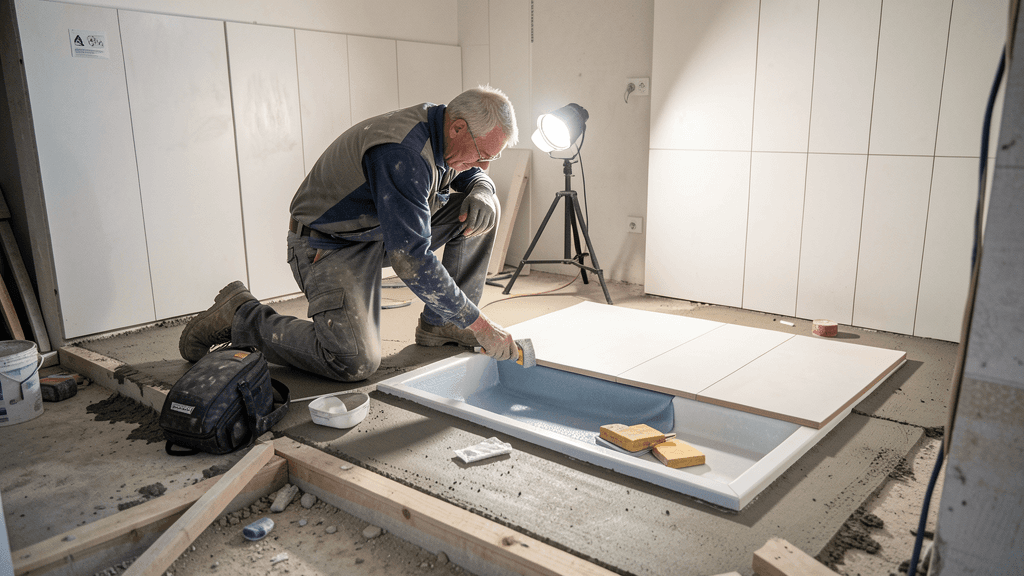
You finished a custom walk-in shower six months ago. Curbless entry, 12x24 porcelain on the walls, mosaic floor, glass enclosure. The homeowner loved it. You got paid $4,200 for the tile work and moved on to the next job. Now the homeowner is calling. The ceiling below the shower is stained. Their plumber cut open the drywall and found rotted subfloor. The plumber says the pan leaked. The homeowner wants you to pay for the repairs. The estimate from the water damage restoration company is $11,800.
This is a shower pan waterproofing failure callback. It is the single most expensive callback a tile installer can face, because the damage extends far beyond your tile work. A failed pan means demolition of the ceiling below, subfloor repair, mold remediation, and re-tiling. You are not redoing a $4,200 shower. You are paying for a $12,000 to $18,000 repair bill that includes work you never touched.
The Tile Council of North America (TCNA) publishes a Handbook for Ceramic, Glass, and Stone Tile Installation that details wet-area waterproofing requirements. The TCNA Handbook, along with ANSI A108.01 and A118.10, defines what a compliant shower pan looks like. Most installers know these standards exist. The problem is that four specific steps get skipped under production pressure, and those four steps are where almost every leak claim originates.
This guide walks through the four most commonly missed steps, the documentation protocol that protects you when a leak appears years later, and what to do the day the callback call comes in. The goal is not to teach you waterproofing from scratch. The goal is to show you where the liability lives and how to close the gap between a good-looking shower and a defensible installation.
What a Shower Pan Waterproofing Failure Callback Actually Costs a Tile Installer
The numbers are what make this conversation urgent. A typical residential shower pan tile installation runs $2,800 to $5,500 depending on size, tile selection, and custom features. The callback repair when a pan fails starts at that number and adds the downstream damage. Here is what a real claim looks like when the homeowner pursues it:
1. Ceiling drywall repair below the shower: $400 to $850. This is the first thing the homeowner notices, and the first thing they blame you for.
2. Subfloor and joist repair: $1,200 to $3,500. Water that passes the liner saturates the wood subfloor. Rotted joists require structural repair.
3. Mold remediation: $1,500 to $4,000. Insurance companies and restoration contractors routinely find mold behind the wet drywall, especially in bathrooms with poor ventilation.
4. Full shower demolition and rebuild: $3,500 to $7,000. You are tearing out tile, membrane, backer board, and drain assembly, then reinstalling everything from the studs out.
5. Alternative lodging for the homeowner: $800 to $2,000 if the only bathroom is out of service for two weeks. Some homeowners pursue this as part of their claim.
Total exposure: $7,400 to $17,350. On a $4,200 tile job, you are looking at a 2x to 4x callback cost, not counting the time you spend managing the dispute instead of billing work. According to the NumeralQ 2026 Bathroom Waterproofing Cost Study, waterproofing failure remediation averages $8,200 per incident across residential bathrooms, with pan failures representing the most common and most costly failure type.
The 4 Missed Steps That Cause Most Leak Claims
Every shower pan leak traces back to one of four installation steps. These are not obscure requirements. They are documented in the TCNA Handbook and required by building code in most jurisdictions. They get missed because they add time to a job where the installer is already behind schedule.
Step 1: No pre-slope under the liner
The most common failure point in traditional PVC liner and hot-mop shower pans is the absence of a pre-slope beneath the liner. The TCNA Handbook details require a minimum 1/4 inch per foot slope from the drain to the walls, applied to the subfloor before the liner goes down. Without this pre-slope, water that penetrates the mortar bed sits flat against the liner and has no path to the weep holes in the drain assembly. It pools, it breeds mold, and eventually it finds a seam or a pinhole.
Installers skip the pre-slope because it adds 30 to 45 minutes of work and requires an extra batch of deck mud. The cost of that deck mud is about $12. The cost of skipping it shows up 18 to 36 months later as a callback.
Step 2: Weep holes blocked or absent
The drain assembly in a traditional shower pan has weep holes designed to let water that reaches the liner flow into the drain. If those weep holes are packed solid with thinset, clogged with mortar, or covered by the membrane itself, water has nowhere to go. The TCNA Handbook specifies that pea gravel or a weep hole protector must be placed around the drain to keep the path open during the mortar bed pour.
This step takes 5 minutes. A handful of pea gravel costs nothing. But it requires the installer to stop, think about the drain, and protect the weep holes before dumping the mortar bed. Under time pressure, it gets skipped. The result is a pan that holds water like a bathtub below the tile surface.
Step 3: Curb and dam corner detail failures
The shower curb is where the liner transitions from horizontal to vertical, and it is where most liner leaks occur. The TCNA Handbook requires the liner to wrap up and over the curb, with inside corners folded and sealed, not cut and pieced. ANSI A118.10 defines the standard for liquid waterproofing membranes applied over backer board, and many installers now use liquid or sheet membranes instead of traditional liners. But the curb remains the weak point in every system.
The specific failures: liner folded flat at the curb top instead of wrapped, inside corners cut and patched instead of folded, and the curb not waterproofed to the exterior edge so water wicks through the front face.
Step 4: No flood test before tile installation
A flood test is the process of plugging the drain, filling the shower pan with water to the top of the curb, and waiting 24 hours to see if the water level drops. The TCNA Handbook recommends flood testing as a verification step. Some local building codes require it. It costs zero dollars in materials and 24 hours of waiting. No tile installer who flood tests a pan has ever had to wonder whether it leaks.
Despite this, flood testing is the most commonly skipped step in residential tile work. The reason is scheduling. A flood test requires setting the pan, leaving for 24 hours, and coming back. On a three-day bathroom schedule, that pause feels like lost productivity. It is actually the cheapest insurance policy in the construction industry.
Membrane Selection and Why It Changes Your Callback Risk Profile
The membrane system you choose affects which failure modes you are exposed to. There is no universally best system, but there are systems that shift the risk from "invisible leak in two years" to "visible failure during installation."
Traditional PVC or CPE liner with pre-slope and mortar bed: Lowest material cost ($45 to $80 for liner and drain assembly). Highest installation skill required. Most common callback source because the pre-slope and weep hole steps are easy to skip. The liner is buried under the mortar bed, so a leak is invisible until it damages the ceiling below.
Liquid waterproofing membrane (e.g., Laticrete Hydro Ban, Mapei Mapelastic AquaDefense): Applied with a roller over backer board or mortar bed. ANSI A118.10 compliant. The advantage is that you can see the membrane after it is applied. If you miss a spot, you can see it before you tile. Callback risk is lower than traditional liners because the failure points are visible, but only if the installer applies the correct number of coats and embeds fabric at corners and changes of plane.
Sheet membrane system (e.g., Schluter Kerdi, Wedi): Prefabricated waterproof panels and sheet membranes that bond to the substrate with thinset. Highest material cost ($180 to $350 for a typical shower) but the fastest installation and the lowest callback risk. The seams are visible and testable before tile goes on. Schluter Systems publishes installation specifications that, when followed, shift the liability from the installer to the manufacturer if the system fails.
None of these systems eliminates the need for a flood test. A flood test catches errors in every system, and it is the one step that converts "I think it is waterproof" to "I can prove it is waterproof."
The Documentation Package That Makes a Callback Claim Unwinnable Against You
When a homeowner calls two years later saying the shower is leaking, the conversation becomes about fault. The plumber says the pan failed. The homeowner says you installed it. Your insurance company asks for documentation. If you have none, the claim defaults against you regardless of whether the cause was your installation, a plumbing leak, or deteriorated grout.
The documentation package that protects you takes 20 minutes per shower and consists of five items:
1. Pre-installation substrate photos: Photograph the bare subfloor, wall framing, and drain rough-in before any material goes down. These prove the substrate was sound and the drain was correctly positioned when you started. If the leak turns out to be a plumbing joint behind the wall, these photos show the plumbing was already in place when you began.
2. Membrane installation photos: Photograph the installed liner or membrane before the mortar bed or tile goes over it. For traditional liners, photograph the pre-slope, the folded curb corners, and the weep hole protection. For liquid membranes, photograph each coat and the fabric reinforcement at corners. These photos prove the waterproofing layer was installed correctly before it was covered.
3. Flood test log: A single photo of the pan filled with water, a timestamp visible, and a note recording the start level. A second photo 24 hours later showing the same water level. This is the single most powerful piece of evidence you can produce. If you flood tested the pan and it held for 24 hours, the installation was sound at the time of handover. Any leak that develops later points to a subsequent cause.
4. Product lot numbers: Write the product name, lot number, and installation date on the backer board or framing with a permanent marker before covering it. Photograph it. If a membrane defect is the cause, the lot number lets you shift liability to the manufacturer under their product warranty.
5. Signed homeowner acknowledgment: A one-page document the homeowner signs at completion stating that the shower was installed per TCNA guidelines, flood tested, and that they are responsible for maintaining grout and sealant joints. This shifts the burden of proof to the homeowner if they later claim the installation was defective.
The TileForeman blog, a resource for tile contractors, describes the flood test as the step that protects tile contractors from liability because it creates a verifiable record that the pan held water before tile was installed. WorkReceipt, a field documentation tool for trades, similarly emphasizes that the documentation window closes the moment tile covers the membrane. Once the tile is down, the waterproofing layer is invisible, and without photos, you cannot prove what you did.
What to Do When the Callback Call Comes In 18 Months Later
When the callback arrives, the first instinct is to get defensive or to rush over and start tearing things out. Both reactions make the situation worse. Here is the sequence that protects your business:
Do not admit fault. Say: "I want to understand what is happening. Can you send me photos of the damage and tell me what your plumber found?" You need information before you can determine whether the problem is your installation, a plumbing issue, or something else entirely.
Request access for inspection. Ask to see the damage before any demolition occurs. If the ceiling below is open, photograph everything. If the shower floor is already torn out, you have lost the ability to inspect the membrane layer where the evidence lives.
Pull your documentation. Locate your pre-installation photos, flood test log, and signed acknowledgment for that job. If you have a flood test photo with a timestamp, you have a strong position. The pan held water for 24 hours. If it leaked later, something changed after handover.
Determine the actual failure point. The most common non-installation causes of shower leaks are: a plumbing leak in the shower valve body behind the wall, a failed grout joint that let water through the tile surface (which is normal wear, not a pan failure), a caulk joint at the floor-to-wall transition that separated, and structural movement that cracked the membrane after settlement.
Involve your insurance carrier before committing to repairs. If the claim is legitimate, your GL policy may cover the downstream damage. If the claim is questionable, your documentation is what your carrier uses to dispute it. Do not agree to pay for repairs out of pocket before your carrier has reviewed the claim.
Pricing Shower Pan Work to Cover Documentation and Callback Risk
If you are spending 20 extra minutes per shower on documentation and 24 hours on a flood test, that time needs to be in your price. Many tile installers price shower pan work as a line item at $800 to $1,200 for the pan alone, separate from the wall tile and floor tile. That line item should cover:
Materials: Liner or membrane, drain assembly, pre-slope material, pea gravel or weep protector, fabric reinforcement. Typically $80 to $350 depending on system.
Labor for pre-slope, liner, and mortar bed: 3 to 5 hours at your fully loaded labor rate.
Flood test time: You are not on site for 24 hours, but the job sits. Factor 0.5 hours for setup and verification.
Documentation time: 20 minutes for photos, lot numbers, and homeowner sign-off. At a $95 per hour effective rate, that is $32.
If your pan line item does not include at least $50 for documentation and flood test overhead, you are subsidizing the risk with your own time. The installer who skips the flood test is self-insuring a $14,000 claim for $0.30 of deck mud and 24 hours of patience.
The ANSI A118.10 standard for waterproofing membranes and the TCNA Handbook are the two documents your insurance adjuster will reference if a claim escalates. If your installation and documentation reflect those standards, you are in a defensible position. If they do not, you are paying for a shower you already built once, plus the ceiling, plus the subfloor, plus the mold.
This guide is published by Heyfield, which makes an AI phone receptionist for home-service trade businesses. If you ever can't take the call, that's what we do. See pricing. The rest of our trade-business resources are free at heyfield.app/blog.
Frequently Asked Questions
How long after installation can a shower pan waterproofing leak appear?+
Most shower pan leaks surface 18 to 36 months after installation. Water penetrates the mortar bed slowly, and the first visible sign is usually a ceiling stain below the shower. By the time the homeowner notices, the subfloor may already be damaged.
Is a flood test required by building code for shower pans?+
Some local jurisdictions require flood testing by code, but it is not universal nationally. The TCNA Handbook recommends flood testing as a best practice regardless of code requirements. A 24-hour flood test is the cheapest liability protection available for a tile installer.
What is the difference between ANSI A118.10 and TCNA Handbook guidelines for shower waterproofing?+
ANSI A118.10 defines the performance standard for waterproofing membranes (liquid and sheet). The TCNA Handbook details the installation methods that use those membranes. Together they define what a compliant shower pan installation looks like and are the standards an insurance adjuster references in a callback dispute.
Can I use a liquid waterproofing membrane instead of a PVC liner for a shower pan?+
Yes, if the membrane is ANSI A118.10 compliant and applied per the manufacturer instructions over a suitable substrate. Liquid membranes like Laticrete Hydro Ban or Mapei Mapelastic AquaDefense are widely used. The advantage is visibility: you can see coverage before tiling. You still need fabric reinforcement at corners and a flood test.
What documentation should I keep for each shower pan installation?+
Five items: pre-installation substrate photos, membrane installation photos before tile covers it, a flood test log with timestamps, product lot numbers written on framing, and a signed homeowner acknowledgment that the shower was installed per TCNA guidelines and flood tested. This package takes 20 minutes per shower.
How do I price a shower pan installation to cover callback risk?+
Your shower pan line item should include materials ($80 to $350 depending on system), labor for pre-slope and liner (3 to 5 hours), flood test setup time (0.5 hours), and documentation time (20 minutes at your effective rate). A typical range is $800 to $1,200 for the pan alone, separate from wall and floor tile.
What should I do if a homeowner calls saying their shower is leaking two years after I installed it?+
Do not admit fault. Ask for photos of the damage and the plumber findings. Request access to inspect before demolition occurs. Pull your documentation package including the flood test log. Determine whether the leak is from the pan, a plumbing joint, failed grout, or structural movement. Contact your GL insurance carrier before committing to any repairs.
Does my general liability insurance cover shower pan leak callbacks?+
Most GL policies cover downstream property damage if the failure is traced to your installation work. However, coverage depends on the policy terms and whether the damage is classified as faulty workmanship (often excluded) versus resulting property damage (often covered). Review your policy with your broker and always involve the carrier before paying out of pocket.
Ready to stop missing calls?
Try Heyfield free for 7 days. Your AI receptionist answers every call, collects customer details, and texts you the summary.
Keep Reading
Why Welding Shops Can't Risk Answering Their Own Phones
Sparks fly, face shields go down, and phone calls go to voicemail. How safety-first welding shops lose business to missed calls.
ReadPool Service Owners: Every Missed Call Costs You $900
Pool season is short and winterization is now. One missed call can cost you a full-season client worth $900+. Here's how solo pool service pros stop losing jobs to voicemail.
Read